FAQs PAGE
OBDI Tuner and RT Tuner
OBDII Tuner
What will
I need to tune my vehicle?
1994 - 95 LT1 Cars:
If you
are working on a 1994 - 95 LT1 car you'll need one of our
LT1 Tuning Kits or
LT1 Pro Tuning Kits. These kits come complete
with the Tuner program, $EE ECM Definition File and the interface cables you'll
need to connect you PC to the car for reading and programming the car's
computer. If you car has an OBDI style ALDL connector (12 pins), you'll need the
LT1-Tune-1 kit. If your car has an OBDII style ALDL connector you'll need the
LT1-Tune-2 kit. If you'd like to be able to tune cars with either style ALDL
connector then you should get the LT1-Tune-Y kit. The Pro versions of the kits
includes everything in the standard versions plus the
DataCat data logging program.
If you
already have a compatible ALDL cable
then all you'll need is the Tuner program and the $EE ECM Definition File.
1994 - 95 V6 L32 and
L82 Cars:
If you
are working on a 1994 - 95 car with an L32 3.4L V6 or an L82 3.1L V6 then you'll need one of our
V6 Tuning Kits or
V6 Pro Tuning Kits. These kits come complete
with the Tuner program, V6 ECM Definition File and the interface cables you'll
need to connect you PC to the car for reading and programming the car's
computer. If you car has an OBDI style ALDL connector (12 pins), you'll need the
V6-Tune-1 kit. If your car has an OBDII style ALDL connector you'll need the
V6-Tune-2 kit. If you'd like to be able to tune cars with either style ALDL
connector then you should get the V6-Tune-Y kit. The Pro versions of the kits
includes everything in the standard versions plus the
DataCat data logging program.
If you
already have a compatible ALDL cable
then all you'll need is the Tuner program and the V6 ECM Definition File.
EPROM Based Vehicles:
Most other OBDI GM vehicle have a computer that uses
an EPROM to store the calibration information. To tune these vehicles you'll
need one of our OBD1-Tuning or
OBD1 Pro Tuning kits. These are complete
kits with everything you'll need to tune your vehicle including the necessary
software and hardware. If you already have an EPROM programmer for reading and
programming the EPROMs the you can purchase our Tuner program (or the
RT Tuner program if you want to do real-time
tuning) and the appropriate ECM Definition File
separately. The Pro versions of the
kits includes everything in the standard versions plus the
DataCat data logging program and the
USB/ALDL-1 interface cable.
If you would like to be able to tune
your vehicle in 'real-time', that is while the engine is running,
you'll need the RT Tuner program ($99.95) instead of the standard
Tuner program, the appropriate ECM Definition File and the Romulator
EPROM emulator from Transtronics (https://xtronics.com). Real-time tuning allows you
to make changes while the engine is running and immediately see the affects of
the changes you are making. This can
significantly shorten the tuning process. The RT Tuner program does
everything the standard Tuner program does in addition to real-time
tuning support so you don't need both programs. When you're finished
tuning, you'll want to program an EPROM with your final calibration
and disconnect the emulator so you'll still need an EPROM
programmer. If you would like to purchase one of the OBDI-Tune kits with the RT Tuner program instead of the standard
Tuner program you just need to purchase the RT Tuner upgrade
($30.00) when you purchase the kit.
Please note that since the 1994-95 LT1 and V6 car Flash based ECMs do not
have a removable EPROM there's no way to connect an emulator to these ECMs so
you can't do real-time tuning on these cars.
Can I run the Tuner program under Windows Windows 7, 8, 10 or 11?
The Tuner and RT Tuner programs can be run
under Microsoft Windows 7, 8, 10 and 11. Please follow these steps to install
these programs on a PC running Windows 7, 8, 10 or 11:
1. First
you must be logged on as an administrator.
2. In
order for the programs to install correctly the installation programs
must be run in Compatibility mode and as an administrator. Download the setup program for the latest
version of the Tuner program
from the 'Downloads' page on our web site and save it to your Desktop.
3.
Now double click on the setup program to install the
Tuner program and follow the on-screen instruction to complete the
installation.
4.
After completing the installation you'll
also need to set the Tuner program itself to run in compatibility mode.
To do so, right click on the Tuner icon on your Desktop, Select
'Properties' from the pop-up menu and then click the 'Compatibility'
tab. On the Compatibility screen check the 'Run this program in
compatibility mode for' box, select the default Windows XP SP2 (or SP3),
check the 'Run as administrator' box, click on the 'Apply' button and
then click on the 'OK' button.
Why are there multiple
ECM Definition Files for the same Cadillac cars?
Unlike most
other GM vehicles the calibrations used for these cars changed from
calibration to calibration so that the locations of the calibration
parameters in the calibration (.bin) files moved from calibration to
calibration in many cases. When the calibration parameter locations
change or different calibration parameters are used a new ECM Definition
is required. To determine which of the Cadillac ECM Definition Files
you'll need depends on the specific calibration you are working on. The
calibration is identified by the Broadcast code (four letters) which is
located on the ECM label and sometimes also on the Memcal. Compare your
Broadcast codes with the ones listed for each of the Cadillac ECM
Definition Files to find the correct one. If you have a Broadcast code
that is not listed please contact us for more information.

I
just downloaded the latest Tuner update. How do I install it?
The Tuner update is a setup program that installs any updated files to you PC. To install the updates,
just double click on the downloaded file to start the installation and then
follow the on-screen instructions. By default the setup program installs the
updates to the folder 'c:\program files\cats\tuner'. If you originally installed
the Tuner program to a different folder you'll need to change the installation
folder when you run the setup program.
After installing the update, run
the Tuner program and select 'About' from the "Help' . Verify that the
new version is shown on the About screen.
How do I
know if my 94 LT1 car has a Rev B calibration stored in the PCM?
There were a
relatively small number of 1994 vehicles that used the early Rev B
calibration so you should start out with the standard $EE ECM Definition
when working on a vehicle or a calibration file for the first time.
To verify that
the calibration isn't a Rev B, select the 'PCM_EE' from the 'ECM' menu to
use the $EE ECM Definition File. Then open the calibration file using the
'Open' function from the 'Files' menu or read the calibration from the PCM
using the 'Read PCM' selection form the 'Tools' menu.
Next open the
'Constants Table' and look at the values for the Cylinder Volume and
Injector Flow Rate parameters. If these values look reasonable, then you are
working with a standard $EE ECM Definition File. If you are in fact working
with a Rev B calibration, then the values for these parameters will be very
strange; the Cylinder Volume is typically 0 and the Injector Flow Rate will
be a ridiculously large value like 793.46 lbs/hr.
If it
turns out that you are working with a Rev B calibration, then click on the
'ECM' menu and select "PCM_EEB' from the list and re-open the calibration
file or re-read the PCM to view and edit the calibration parameters.
I'm
having trouble communicating with the PCM in my '94/95 LT1. What should I
do?
First check
the following:
1. Unplug the ALDL cable from your
PC and reboot your PC.
2. Once Windows is back up and
running plug your ALDL cable into a USB port on your PC. (It should
not be connected to the car.) If you get the Windows
'Found new hardware' message and
Windows asks to search for a compatible driver then the
drivers did not install correctly and you should repeat the
driver installation process.
3. Once the USB drivers are
installed, click on the Windows 'Start' button and then select
Control Panel. From the
Control Panel double click on 'System', click on the 'Hardware'
tab and then select 'Device Manager'.
4.
Go to 'Mice and other pointing devices' and verify there is no
'Microsoft Serial Ball Point' item listed. If there is right
click on this item and select 'Disable' from the pop-up menu.
5.
Go to 'Ports (COM and LPT) and verify that there is a USB Serial
Port listed
there. Unplug the ALDL cable and this COM port should go away
and then reappear when you plug the ALDL cable back in. If
there is no USB Serial Port listed here then expand the
'Universal Serial Bus controllers' section of the Device Manager
and right-click on the 'USB Serial Converter'. Go to the
'Advanced' tab, and check the box indicated as 'Load VCP'. Then
hit 'OK'. Unplug the USB/ALDL cable, and plug it back in. Expand
the Ports (COM & LPT) section of the Device Manager and you
should now see a USB Serial Port listed.
6.
Note the COM port number assigned to the USB Serial
port. It should be a COM port between 1 and 16.
If a COM port number greater than 16
was assigned you'll need to change the COM port number manually.
To do so right click on the USB COM port on the Device Manager
screen and select 'Properties', click on the 'Port Settings' tab
and then click on the 'Advanced' button. Select a new COM port
number of 16 or less.
(Note: the COM port number you select should
not be currently in use by another port.)
7.
Run the Tuner program and click on the 'ECM' menu. Select
'PCM_EE' from the drop-down list.
8.
Click on the 'Options' menu and select 'Comm Port Setup' from
the drop-down list.
9.
On the Comm Port Selection screen click on the COM port number
that was assigned to the ALDL cable when you installed the
drivers (it should be shown as 'Available') and then click on
the 'OK' button
Here are some things that can cause
communications problems with the vehicle:
1. Make sure there are no other programs
running on the PC when you are reading or programming the PCM, including
virus protection software, screen savers and power management functions.
2. If you are using a laptop with an IR
(Infrared) interface, disable it.
3. Make sure your car battery is fully
charged. Do not attempt to read or program the PCM with a battery
charger connected to the battery.
4. Avoid anything that might generate
electrical noise such as other cars running nearby or large electrical
motors, etc. I've even had reports of laptop battery chargers causing a
problem.
5. Make sure you have a good connection to
the PC and the ALDL connector.
6. Check the in vehicle ground connections,
especially if its an engine swap. A poor ground can cause some strange
problems.
My
ECM has a long blue module (Memcal) but no EPROM. What do I do?
The
EPROMs used is these ECMs are located in the Memcal. (You can see the EPROM
through one of the holes in the top of the Memcal.) To gain access to the EPROM,
carefully remove the blue (sometimes it's tan) plastic cover. The Memcals
generally also contain the 'limp-home mode' resistor network and some knock
sensor signal conditioning circuitry. There are several ways to work with these
Memcals.
1.
You can unsolder the EPROM and then install a standard IC socket so you can
then easily plug in new calibrations. This can be a little tricky if your
not comfortable with a soldering iron and you can damage the EPROM if
you're not careful.
2. You can use the HDR1 Memcal adapter that allows you to plug the Memcal
into your EPROM programmer. The only downside to this is you may need
to modify your EPROM eraser so you
can put the entire Memcal in it to erase EPROM and every time you want to
make a change, you have to erase that EPROM unless you have multiple Memcals.
3.
You can use the G1 Memcal Adapter. This allows you to use the SST27SF512 Flash
chip in place of the original EPROM (which can be left in the Memcal). This
allows you to easily remove the Flash chip, erase and reprogram it with the
inexpensive Burn 2 programmer and reinstall it with no soldering required.
How do I use the
C.A.T.S Tuner Program?
The Tuner is a generic tool configured by ECM
Definition Files
that have the required information for a specific ECM or PCM. Obviously the hard part is
knowing what the binary values define and how to scale them into useful engine units.
The program runs like most Windows applications,
and is in simple English. No knowledge of binary or hex is required. Checksums are
automatically updated upon saving the final result.
To use the Tuner program effectively, the user will need to understand the functions of the
internal combustion engine and the basic operation of a closed loop control system.
I
started the Tuner program. Now what do I do?
I
have the Tuner program running but most of the menus are inactive and nothing
seems to work. You have to open a calibration file before most of the functions of the
Tuner program become active. If you're running the evaluation version of the
program there is a sample type $42 calibration file included in the Tuner folder.
The Tuner setup
program will not run?
When
I try to run the Tuner setup program, the main setup screen is displayed briefly
and then the screen disappears and the program ends. This problem usually occurs
because the riched32.dll file is missing from your 'System' subdirectory or the
files is an incorrect version. Click on the following link to download the
current version of this dll file.
riched32.zip
To
install this file, unzip it and place it in your 'System' (or 'System32')
subdirectory. If there is already a version of this dll file in this
subdirectory, do not over-write it. Rename the existing file 'riched32.old'
first.
How
do I
identify the correct ECM Definition File?
Like most GM products, calibrations are
defined by a part numbers, a traditional 8 digit number and by a short form description
know as a "Broadcast Code"
Example:
| Broadcast Code |
P/N |
ECM or PCM P/N |
Program
ID |
Scan tool ID |
| ARJU/7493 |
16147492 |
01227747 |
$42 |
6301 |
| ANHT/2498 |
16134297 |
01227727 |
$8D |
5081 |
| ASWH/1727 |
16141562 |
01227727 |
$55 |
6121 |
| ATNX/5668 |
16145667 |
01227730 |
$8D |
5571 |
|
Broadcast Code:
The four letters are unique to
the actual software, the '/' and 4 digits are the last 4 digits of GM's part number for
this particular calibration. |
P/N:
This 8 digit number is the part
number of a calibration installed in memory (EPROM) and and other hardware required to
install it in you ECM or PCM. |
ECM P/N:
The ECM (or PCM) p/n describe the specific
hardware that the code is to be used in. |
Program ID:
The template ID is always a two
bit code that describes the "layout" of the calibration, in other words exactly
where thing are located and the calculations performed. While the layout is the same the
numerical calibration will differ for each Broadcast Code
|
Scan Tool ID:
The Scan Tool ID allows a
mechanic to identify the exact calibration by reading a "Scan ID" form any Scan
Tool. |
|
| After quick review of the above
information, it should be obvious that the ECM or PCM part number doesn't describe the
software, we prefer to use the broadcast code and the Program ID byte. Our ECM definition
files are set up to match specific calibrations therefore we name them after the ID
byte. Referring to the
example, the TunerCat $8D configuration file will run with ANHT and ATNX even though they
reside in different ECM's both are $8D templates. What this means is the spark
table will be located in the same place and be scaled the same, and so will all the other
tables in the $8D calibrations, (These happen to be Camaro & Vette calibrations).
The $55 calibration is a
Buick/Pontiac/Chevy passenger car, after the first 12 or so bytes the calibration is
completely different than the $8D calibrations. |
|
What kind of calibration
files work with the Tuner program?
Binary files (EPROM image) sometimes known as a binary dump are the required data format. These files are the most
compact and are a direct EPROM (or Flash ROM) image.
I get a file
error message when opening a calibration file. What's the problem?
If you
open a valid calibration file but have chosen the incorrect ECM Definition File,
the following error message will be displayed:
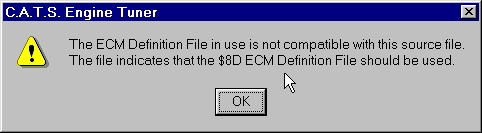
To correct this problem, click
on the 'ECM' menu and select the correct ECM Definition File before opening the
calibration file.
If the calibration file is
corrupt or in a format that the Tuner program does not recognize the following
error message will be displayed.
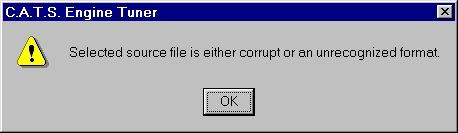
The calibration file must be a binary
file that is an exact binary image of the EPROM. This means that the binary file must
also be the correct
length for the type EPROM used in your ECM. The file extent must be '.bin'.
Do I need to understand
binary or hex numbers?
No, the C.A.T.S Tuner works with decimal numbers expressed
in conventional units e.g. RPM, milliseconds, Volts. The translation to the native binary is
automatic.
How Do I work with
EPROM's?
There are two basic options when working with the older ECMs that used an EPROM
to store the calibration information.
1. You can use the appropriate adapter (G2 EPROM
Adapter for the earlier ECMs or the G1 Memcal Adapter and HDR1 Memcal Adapter
for the later ECMs that had a Memcal). This allows you to use the SST27SF512
Flash chip in place of the original EPROM. Using the SST27SF512 Flash chip
allows you to use the inexpensive Burn 2 Programmer to erase and reprogram
the Flash chip. This option has several advantages.
A. You can use the Burn 2 Programmer rather than a more expensive standard EPROM
programmer.
B. You don't need a UV EPROM eraser.
C. You can leave the original EPROM unchanged.
2. You can erase and reprogram the original
EPROM. To do this you will need an EPROM programmer and a UV EPROM eraser. While
the 'up-front' cost for this option is higher if you plan to tune a large number
of vehicles this option would be less expensive because you don't need an
adapter and Flash chip for each vehicle you tune.
Most GM ECM's use 2732, 27C128, 27C256 or 27C512 EPROM's.
Most
any part number variation is ok, the processors are relatively slow, so you don't
need to buy fast
chips. (See our EPROM Pin out page for further information.)
Some sources of EPROM's and Programming equipment are
listed on our Links page.
How Do I work with
PCM's with Flash Memory
The FLASH memory chips are not removable. To tune this vehicles you need to
connect to the ALDL connector in the vehicle. The Tuner program has built in
utilities to read and program the PCM through the car's ALDL communication
connector but you will need one of our USB/ALDL interface cables so that you can
connect you PC to the vehicle.
We offer complete tuning
kits for the 1994 - 95 LT1 and V6 L32 and L82 cars that include
everything you'll need. These kits include the Tuner
program, the appropriate ECM Definition File and the ALDL
interface cable you need to read and reprogram the
car's computer. This cable connects you PC to the
car's ALDL (diagnostic) connector under the dash.
Two different ALDL connectors were used in these
cars; an OBDI style 12 pin connector and an OBDII
style 16 pin connector.
There are three
different versions of each of these
kits available. Which version you'll need depends on
the type of ALDL connector in your car:
For
the 1994 - 95 LT1 Cars:
LT1-Tune-1: This kit
includes an OBDI style ALDL interface cable for cars
with the OBDI style 12 pin ALDL connector.
LT1-Tune-2: This kit includes an OBDII style
ALDL interface cable for cars with the OBDII style
16 pin ALDL connector.
LT1-Tune-Y: This kit includes an ALDL interface
cable that will work with both types of ALDL
connectors.
For
the 1994 - 95 L32 and L82 V6 Cars:
V6-Tune-1: This kit
includes an OBDI style ALDL interface cable for cars
with the OBDI style 12 pin ALDL connector.
V6-Tune-2: This kit includes an OBDII style
ALDL interface cable for cars with the OBDII style
16 pin ALDL connector.
V6-Tune-Y: This kit includes an ALDL interface
cable that will work with both types of ALDL
connectors.
Why
does the Tuner program ask for a password when I select an ECM?
The ECM
Definition Files have provisions for password protection. This provision was
included for users who are developing their own ECM Definition Files using the
Definition File Editor program. While we do not use this feature with our
Definition Files, these files do contain a 'default' password that the Tuner
program ignores. These passwords (including the default password) are keyed to the
'last modified' date of the Definition File so if this date is changed, for
instance by editing the Definition File with any program other than the C.A.T.S.
ECM Definition File Editor, the default password will no longer be correct.
Also if an ECM Definition File is
transferred from one PC to another or e-mailed without being zipped, the 'last modified' date will be changed
and this will result in the request for a password. If
you want to transfer or e-mail an ECM Definition File you must zip it
first.
How
much does the Tuner program cost?
The
registration cost of the Tuner program is $69.95. This registration cost
includes the $42 ECM Definition File.
All other ECM Definition Files cost $19.95
each.
How What's the difference between a calibration file and an ECM Definition File?
There are two different
types of files associated with the Tuner program, the ECM Definition File (.tdf)
and the calibration file (.bin). This can be a little confusing at first.
The Tuner program is a general purpose calibration editor program that works
with a wide variety of different vehicles and the ECM Definition Files provide
all the information that is unique to each vehicle type; information such are
the location of the calibration values, scale factors, etc). When you make a
selection from the 'ECM' menu in the Tuner program, the Tuner program opens the
selected ECM Definition File.
The calibration (.bin) file contains the actual calibration information that is
stored in the ECM itself such as spark advance and fuel values. The calibration
file is the file that you actually edit with the Tuner program. This file is a
binary format file typically created by reading the EPROM from the vehicle's
computer (ECM) with an EPROM programmer. To open a calibration file click on the
'Files' menu and select 'Open' from the drop-down list. Once the calibration
file is opened in the Tuner program the 'Tables' menu will be active allowing
you to view and edit the various calibration parameters.
Once you have made whatever changes to the calibration file you wanted you then
reprogram the EPROM with the modified calibration file to use it in the vehicle.
I
received an updated Definition File. How do I install it?
When you
request an update to an ECM Definition File we will send you an e-mail with a
link to download the installation program for the ECM Definition File update.
Click on this link and save the update program to your Desktop. To install the updates
double click
on the update program file to run the self-extracting program and follow the
on-screen instructions. Use the
password that
was included in the e-mail when requested.
Windows 7,
8, 10 or 11 Users: The self-extracting file normally unzips the ECM
Definition Files into the default Tuner folder (c:\program files\cats\tuner). If
you are running Windows 7, 8, 10 or 11,
the operating system may not allow the self-extractor to unzip
these files to the default folder. If you get a 'Can not create a file' error
message you'll need to change the 'Extract To' folder when you run the
self-extractor to another folder such as 'c:\temp' or your desktop and then
manually copy the unzipped files to your Tuner folder.
For more detailed installation instructions view
the ECM
Definition File Update Installation Instructions
When
I try to open a particular table, I get a run-time error 6.
This is
usually cause by a outdated version of the FormLib.tff file. To download the
latest version of this file, click on the following link:
FormLib.exe
After
downloading this file double click on it to install the update.
What
is C.A.T.S. update policy?
If you are
a registered user (i.e. you have purchased the Tuner or RT Tuner program), you are always entitled to any updates that we make to the software
and any of the ECM Definition File which you have purchased.
How
do I know if I have the latest version of my ECM Definition Files?
To check
which versions of the Tuner program, FormLib file and ECM Definition Files you
are currently using, run the Tuner program and select 'Version Information' from
the 'Help' menu. Compare your versions with the 'Version
Info' page on our web site.
If you are
a registered user of the Tuner or RT Tuner program and you
need updates to any of your files, please send us an e-mail and tell us which
updates you need. We will then e-mail them to you.
Is
the OBDII Tuner still available for purchase from C.A.T.S.?
No. In order to
increase our ability to continue product development and to provide improved
technical support the standard OBDII Tuner program is now being sold exclusively
through JET Performance Products as the JET Dynamic Spectrum Tuner.
I
am a current user of the OBDII Tuner program. Do I now get support from JET?
No. We are still
supporting our current OBDII Tuner customers. You should contact us for updates
to the software and Vehicle Definition Files as well as purchasing new Vehicle
Definition Files.
How
can I get the latest version of the OBDII Tuner program?
We've posted the latest updates to the
OBDII Tuner and WinFlash OBDII programs on our web site at:
and
I'm
having problems communicating with the vehicle. What can I do?
1. First
make sure you are running the current version of the WinFlash OBDII
program. To check which version of the WinFlash OBDII program you
are using, run the WinFlash program and click on the Help menu. Select
'About' from the drop-down list to display the program version. To check
on the latest version available click on the following link:
If you are
not running the latest version of the WinFlash program then download and
install the update to the latest version from this link.
2. Verify
that you have installed the USB drivers for the OBDII interface.
3. Unplug the OBDII interface from
your PC and reboot your PC.
4. Once Windows is back up and
running plug your OBDII interface into a USB port on your PC.
(It should not be connected
to the car.) If you get the Windows 'Found new hardware'
message and Windows asks to
search for a compatible driver then the drivers did not
install correctly and you should repeat the driver installation
process.
5. Once the USB drivers are
installed, click on the Windows 'Start' button and then select
Control Panel. From the
Control Panel double click on 'System', click on the 'Hardware'
tab and then select 'Device Manager'.
6.
Go to 'Mice and other pointing devices' and verify there is no
'Microsoft Serial Ball Point' item listed. If there is right
click on this item and select 'Disable' from the pop-up menu.
7.
Go to 'Ports (COM and LPT)' and verify that there is a USB Serial
Port listed
there. Unplug the OBDII interface and this COM port should go
away and then reappear when you plug the OBDII interface back
in. If there is no USB Serial
Port listed here then expand the 'Universal Serial Bus
controllers' section of the Device Manager and right-click on
the 'USB Serial Converter'. Go to the 'Advanced' tab, and check
the box indicated as 'Load VCP'. Then hit 'OK'. Unplug the
USB/ALDL cable, and plug it back in. Expand the Ports (COM & LPT)
section of the Device Manager and you should now see a USB
Serial Port listed.
8.
Note the COM port number assigned to the USB Serial
port. It should be a COM port between 1 and 16.
If a COM port number greater than 16
was assigned you'll need to change the COM port number manually.
To do so right click on the USB COM port on the Device Manager
screen and select 'Properties', click on the 'Port Settings' tab
and then click on the 'Advanced' button. Select a new COM port
number of 16 or less.
(Note: the COM port number you select should
not be currently in use by another port.)
9.
Run the WinFlash OBDII program. Click on the 'Setup' menu and
select 'Comm Port Setup' from the drop-down list.
10.
On the Comm Port Selection screen click on the COM port number
that was assigned to the OBDII interface when you installed the
drivers (it should be shown as 'Available') and then click on
the 'OK' button.
11.
If the vehicle is equipped with OnStar make sure that you pull the
associated fuse(s) to disable
it.
To
disable the OnStar system in 1999 - 2002 vehicles
remove the following fuses:
SEO1 (Special Equipment Options/OnStar)
To
disable the OnStar system in 2003 - 2005 vehicles remove the following
fuses:
INFO (Vehicle Communications Interface Module)
RADIO (Entertainment System)
If you
still have problems reading the PCM try removing the following
additional fuses:
TBC
BATT (Body Control Module - under hood fuse box)
TGC
IGN 1 (Body Control Module - under hood fuse box)
SEO
ACCY (Special Equipment Options/Assy)
TBC
2A (Body Control Module)
TBC 2B (Body Control Module)
TBC 2C (Body Control Module)
TBC ACCY (Body Control Module)
Is
there any data logging software that is compatible with the C.A.T.S. OBDII
interface cable?
Yes, the ECM-Pro Scan Tool program from Wester's Garage (http://westers_garage.eidnet.org) is fully compatible with the C.A.T.S. OBDII interface cable.